How to Deep Clean Your Kitchen Sink in 5 Easy Steps

The kitchen sink is one of the most frequently used areas in the home, serving countless functions from food preparation to dishwashing. Over time, it can accumulate grime, stains, and bacteria, making it essential to deep clean this important fixture regularly.
Understanding the Importance of a Clean Kitchen Sink
Why Clean Your Kitchen Sink?
Regular cleaning is crucial for maintaining hygiene in your home, especially in the kitchen. The kitchen sink can harbor harmful bacteria, such as E. coli and Salmonella, due to food preparation and handling. A clean sink reduces the risk of foodborne illnesses and creates a healthier space for cooking.
Benefits of Deep Cleaning Your Sink
Aesthetic Appeal: A gleaming sink enhances the overall appearance of your kitchen, making it more inviting.
Preventing Stains and Odors: Regular deep cleaning prevents stubborn stains and unpleasant odors from developing.
Extending the Life of Your Sink: Routine maintenance can prolong the life of your sink and keep it looking new for years.
Promoting Hygiene: A clean sink reduces the risk of cross-contamination during food prep, protecting your family’s health.
Boosting Home Value: A well-maintained kitchen, including a shiny sink, can increase your home’s value if you ever decide to sell.
Step 1: Gather Your Supplies
Before you begin the deep cleaning process, it’s important to gather all the necessary supplies. Having everything at hand will make the cleaning process more efficient and effective.
Recommended Cleaning Supplies
- Dish Soap: Look for a strong dish soap that cuts through grease.
- Baking Soda: Acts as a gentle abrasive and deodorizer.
- White Vinegar: A natural disinfectant that helps break down stains.
- Scrubbing Sponge or Brush: Choose one that won’t scratch your sink’s surface.
- Microfiber Cloths: Ideal for polishing the sink afterward.
- Rubber Gloves: Protects your hands from harsh cleaners and hot water.
- Spray Bottle: For mixing and applying your cleaning solution.
- Old Toothbrush: Great for getting into crevices and hard-to-reach spots.
Optional Supplies
- Lemon: For natural deodorizing and antibacterial properties.
- Hydrogen Peroxide: A powerful disinfectant for extra cleaning power.
- Commercial Cleaner: If you prefer using store-bought products, ensure they are suitable for your sink’s material.
Step 2: Remove Debris and Rinse
Before applying any cleaning solutions, it’s important to prepare your sink by removing any visible debris. Follow these steps to clear your sink effectively.
Clear Out the Sink
Remove Dirty Dishes: Start by clearing out any dirty dishes, utensils, or food particles from the sink.
Empty the Sink Area: Remove any sponges, soap dispensers, or other items around the sink to give you full access to clean.
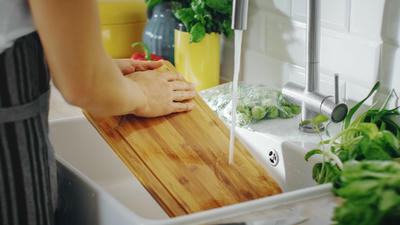
Flush with Water: Turn on the faucet and let hot water rinse down the sides of the sink. This will help loosen any stuck-on food or debris.
Inspect for Stains and Build-Up
Take a moment to examine your sink closely. Look for any stains, water spots, or buildup in the basin, around the faucet, and on the drain. Identifying problem areas will help you concentrate your cleaning efforts.
Step 3: Apply Cleaning Solutions
Now that your sink is prepped and debris-free, it’s time to apply your cleaning solutions. You can use a combination of homemade and commercial solutions to ensure a thorough clean.
Creating a Cleaning Paste
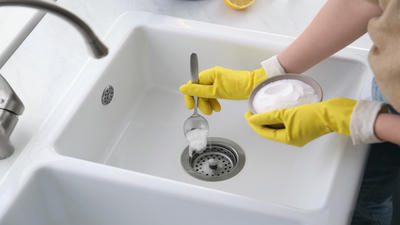
Mix Baking Soda and Water: In a small bowl, combine baking soda with enough water to form a paste. This will be your gentle abrasive cleaner.
Alternative Solutions: If you prefer, you can create a spray solution by mixing equal parts of white vinegar and water in a spray bottle. This is effective for disinfecting.
Cleaning the Sink Surface
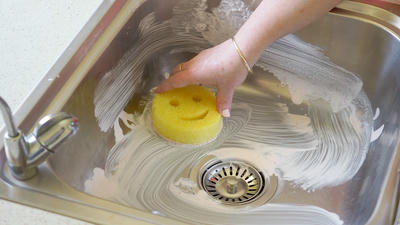
Apply the Cleaning Paste: Use your scrubbing sponge or brush to apply the baking soda paste to the sink’s surfaces. Focus on areas with visible stains or grime.
Scrub Gently: Use circular motions to scrub the sink surface gently. Be careful not to scratch the surface, especially if you have a stainless steel or ceramic sink.
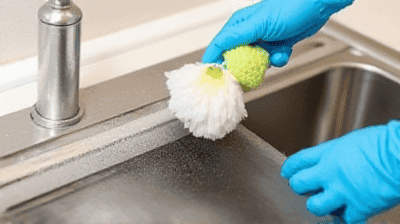
Use Vinaigrette for Tough Stains: For stubborn stains, spray the vinegar solution onto the affected area and let it sit for a few minutes before scrubbing.
Clean the Faucet and Handles: Don’t forget to clean the faucet, handles, and any nearby fixtures. Use an old toothbrush dipped in your cleaning solution to get into crevices.
Rinse Thoroughly
After scrubbing, thoroughly rinse the sink with hot water to wash away the cleaning solution and any loosened debris. Ensure no residue is left behind, as it can lead to streaks once the sink dries.
Step 4: Disinfect and Deodorize
After cleaning the sink surfaces, it’s crucial to disinfect and deodorize. This step ensures that any remaining bacteria are eliminated and any unpleasant odors are neutralized.
Disinfecting with Hydrogen Peroxide
Apply Hydrogen Peroxide: Spray the sink with hydrogen peroxide. This chemical is effective in killing bacteria and disinfecting surfaces.
Let It Sit: Allow the hydrogen peroxide to sit for about 5-10 minutes without rinsing it off. This will give it time to work effectively.
Rinse Thoroughly: After the sitting period, rinse the sink again with hot water.
Utilizing Lemon for Deodorizing
Lemon is a natural deodorizer that can help keep your sink smelling fresh.
Cut a Lemon in Half: Squeeze the juice from half a lemon into the sink, making sure to cover all areas.
Scrub with the Lemon Rind: Use the other half of the lemon to scrub the sink. The citric acid helps eliminate odors and leaves a pleasant scent.
Final Rinse: Rinse the sink again with hot water to wash away the lemon juice.
Step 5: Dry and Polish
The final step in your deep cleaning process is drying and polishing the sink. This will enhance its shine and prevent water spots from forming.
Drying the Sink
Use a Microfiber Cloth: Take a clean microfiber cloth and wipe down the sink to remove any excess water. Start from the top and work your way down.
Pay Attention to Edges and Corners: Ensure that you dry all edges and corners where water may pool, as this can lead to water marks.
Polishing the Sink
Choose a Suitable Polish: If you’re using a stainless steel sink, consider using a stainless steel cleaner or a few drops of olive oil on the cloth.
Buff the Surface: Apply a small amount of polish or oil to your microfiber cloth and gently buff the sink in circular motions. This will restore shine and create a protective layer.
Final Touches: Ensure all areas are polished, including the faucet and handles. A clean, shiny sink will look inviting and fresh.
Additional Tips for Maintenance
Now that you’ve deep cleaned your kitchen sink, maintaining its cleanliness will help you avoid buildup in the future. Here are some tips to keep your sink looking great:
Daily Maintenance
- Rinse After Use: After each use, rinse the sink with hot water to remove food particles and residues.
- Wipe Down: Use a damp cloth to wipe down the sink daily. This will prevent grime from accumulating.
- Avoid Harsh Chemicals: Limit the use of harsh cleaners that can damage the finish of your sink. Opt for natural solutions when possible.
Weekly Cleaning Routine
- Weekly Scrub: Incorporate a deeper scrub into your weekly cleaning routine, using the same methods outlined in this guide.
- Check for Buildup: Regularly inspect for any signs of buildup or staining and address them immediately.
Monthly Deep Cleaning
- Thorough Inspection: At least once a month, perform a thorough inspection and deep clean following the steps in this guide.
- Clean Drain and Garbage Disposal: Consider cleaning your sink drain and garbage disposal monthly to prevent odors and clogs. Use ice cubes and lemon peels to clean and deodorize your disposal.
Conclusion
Deep cleaning your kitchen sink doesn’t have to be a daunting task. By following these five easy steps—gathering supplies, removing debris, applying cleaning solutions, disinfecting and deodorizing, and finally drying and polishing—you can restore shine and maintain your sink’s cleanliness effectively. A clean sink not only enhances the appearance of your kitchen but also contributes to a healthier cooking environment.
With regular maintenance, your kitchen sink can remain a sparkling and inviting centerpiece in your home for years to come. Embrace the steps outlined in this guide, and enjoy a cleaner, healthier kitchen.